
Maintaining a pristine and professional appearance is crucial for commercial spaces, and a significant aspect of this is the condition of the floors. Whether you manage an office, retail store, healthcare facility, or any other commercial space, stripping, waxing, and maintaining your floor finish is essential to ensure longevity, safety, and aesthetics. In this article, we will provide a comprehensive guide on how to strip, wax, and maintain a commercial floor finish.
The Importance of Floor Maintenance
Before diving into the process of stripping and waxing, it’s essential to understand why maintaining a commercial floor finish is so crucial:
- Safety: A well-maintained floor reduces the risk of slips, trips, and falls, protecting both employees and customers.
- Aesthetics: Clean and shiny floors create a positive impression, enhancing the overall look of your commercial space.
- Durability: Regular maintenance extends the lifespan of your flooring, saving you money on costly replacements.
- Hygiene: Clean floors are essential for maintaining a healthy environment, especially in healthcare and foodservice settings.
Types of Finish
There are various types of floor finishes available, each with its own characteristics, advantages, and suitable applications. Choosing the right floor finish depends on factors like the type of flooring material, the level of foot traffic, maintenance requirements, and aesthetic preferences. Here are some common types of floor finishes:
1. Wax Finish:
- Materials: Typically used on vinyl, linoleum, or VCT (Vinyl Composition Tile) flooring.
- Characteristics: Provides a glossy appearance and some level of protection. Requires regular maintenance, including stripping and waxing.
- Applications: Common in commercial settings with moderate foot traffic.
2. Polyurethane Finish:
- Materials: Suitable for various flooring types, including hardwood, concrete, and some laminates.
- Characteristics: Offers excellent durability, resistance to stains, and a high-gloss finish. Low maintenance and long-lasting.
– **Applications: Ideal for high-traffic commercial areas, gyms, and residential spaces.
3. Epoxy Finish:
- Materials: Used primarily on concrete floors.
- Characteristics: Extremely durable, chemical-resistant, and available in various colors. Provides a glossy or matte finish. Requires professional installation.
- Applications: Common in industrial and commercial environments, including warehouses, garages, and laboratories.
4. Urethane Finish:
- Materials: Suitable for hardwood and concrete floors.
- Characteristics: Offers durability, UV resistance, and a high-gloss appearance. Low maintenance and resistant to moisture.
- Applications: Often used in commercial spaces, sports facilities, and residential homes.
5. Oil-Based Finish:
- Materials: Typically used on hardwood floors.
- Characteristics: Provides a warm, amber tone to the wood and enhances its natural beauty. Requires periodic maintenance and may take longer to cure than other finishes.
- Applications: Common in residential and historic buildings.
6. Water-Based Finish:
- Materials**: Suitable for hardwood floors.
- Characteristics: Offers a clear, low-VOC (volatile organic compound) alternative to oil-based finishes. Dries quickly and has a mild odor. Requires less maintenance than oil-based finishes.
- Applications: Ideal for residential and commercial spaces where a clear finish is desired.
7. Concrete Sealer Finish:
- Materials: Used on concrete floors.
- Characteristics: Protects concrete from moisture, stains, and wear. Available in various levels of sheen, from matte to high gloss.
- Applications: Common in retail spaces, warehouses, and industrial settings.
8. Terrazzo Finish:
- Materials: Primarily used on terrazzo flooring.
- Characteristics: Provides a smooth, glossy surface with intricate patterns and colors. Highly durable and resistant to wear.
- Applications: Typically found in upscale commercial spaces, museums, and institutional buildings.
9. Natural Stone Finish:
- Materials: Used on natural stone floors like marble, granite, and travertine.
- Characteristics: Enhances the natural beauty of the stone, provides protection, and may vary in gloss level.
- Applications: Common in high-end commercial and residential settings.
Selecting the right floor finish is essential for achieving the desired appearance and performance for your space. Consider factors such as maintenance requirements, durability, and the specific needs of your flooring material when making your decision. Additionally, consult with flooring professionals for recommendations tailored to your unique situation.
2. Stripping the Floor
Stripping a commercial floor is the process of removing the existing wax and finish to prepare it for a fresh application. Follow these steps:
A. Gather your supplies: You will need floor stripper, a mop or floor machine, a wet vacuum, safety gear (gloves and goggles, proper non slip shoes), and proper ventilation.
B. Prepare the area: Clear the space of any furniture or obstacles, and ensure it is well-ventilated. Lay towels down at any entrances to absorb liquids that may be tracked off the floors being treated.
C. Dilute the stripper: Follow the manufacturer’s instructions to dilute the stripper with water.
D. Apply the stripper: Spread the stripper evenly across the floor using a mop or floor machine. Let it sit for the recommended dwell time (usually 10-15 minutes).
E. Agitate and scrub: Use a floor machine or scrubbing brush to agitate the stripper, loosening the old finish. Work in sections for larger areas.
F. Remove the old finish: Use a wet vacuum to remove the dissolved finish and stripper. Rinse the floor thoroughly with clean water to remove any residue.
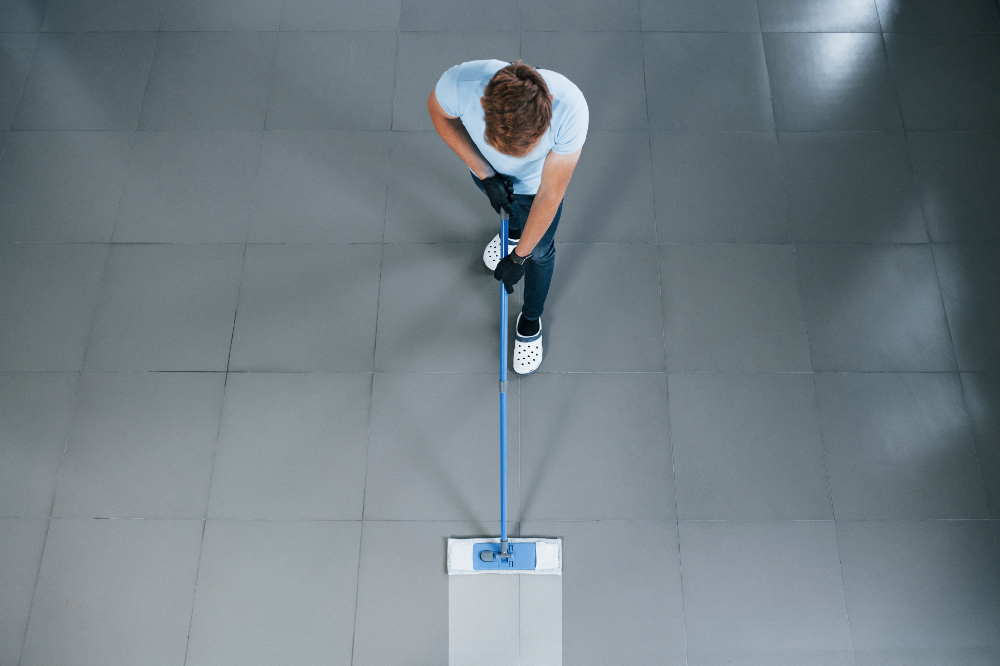
3. Waxing the Floor
Once the floor is stripped, it’s time to apply a new wax finish. Here’s how to do it:
A. Choose the right wax: Select a commercial-grade floor wax appropriate for your flooring type (e.g., vinyl, tile, or hardwood).
B. Prepare the floor: Ensure the floor is clean and completely dry before waxing.
C. Apply the wax: Pour a small amount of wax onto the floor and spread it evenly with a mop, roller, or floor machine. Work in thin, even coats, allowing each coat to dry before applying the next (usually 2-4 coats are recommended).
D. Buff the wax: After the final coat has dried, use a floor buffer to create a high-gloss finish.
4. Maintaining the Floor Finish
Maintaining your commercial floor finish is an ongoing process to keep it looking great for the long term:
A. Regular cleaning: Sweep or vacuum daily to remove dirt and debris. Use a neutral pH cleaner to mop the floor regularly.
B. Preventive measures: Place mats at entrances to trap dirt, and use furniture protectors to prevent scratches.
C. Recoating: Periodically apply a new layer of wax to rejuvenate the finish and extend its lifespan.
D. Address spills promptly: Clean up spills immediately to prevent stains and damage to the finish.
Stripping, waxing, and maintaining a commercial floor finish is essential for safety, aesthetics, and the longevity of your flooring investment. By following the steps outlined in this comprehensive guide, you can achieve a clean, shiny, and well-protected floor that enhances the overall appeal of your commercial space while ensuring the safety and satisfaction of all who enter.
Steps for Maintaining Your Floor
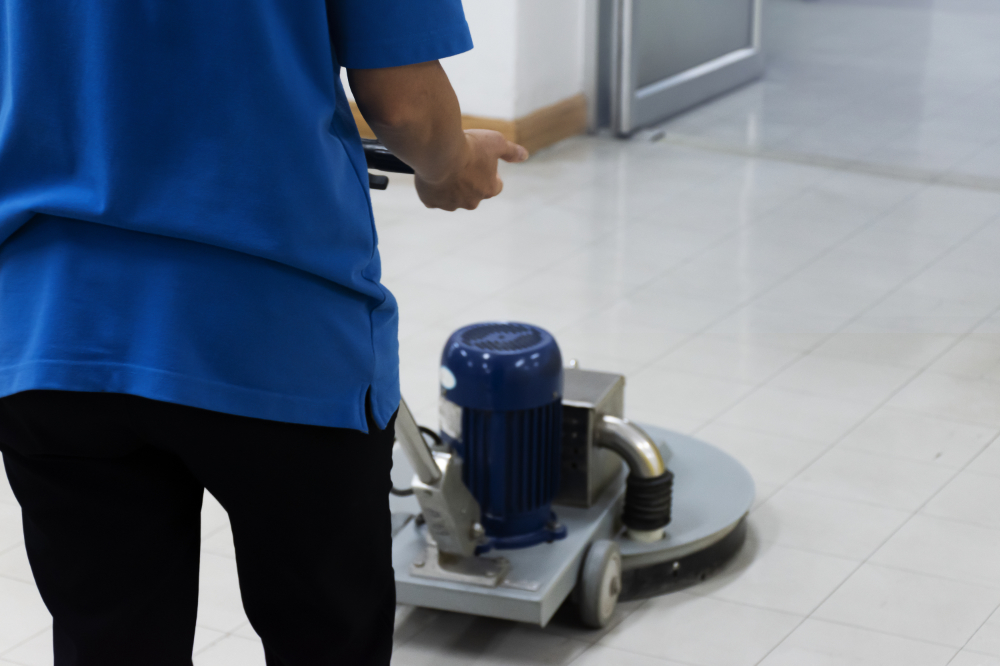
Buffing a commercial floor finish is a crucial step in maintaining the appearance and durability of your floors. Buffing helps restore shine, remove scuff marks, and extend the life of the floor finish. Here’s a step-by-step guide on how to buff a commercial floor finish:
Materials and Equipment Needed:
- Buffing machine: Choose the appropriate machine, such as a low-speed buffer (175-300 RPM) or high-speed burnisher (1000-3000 RPM), depending on your floor type and finish.
- Buffing pads: Select the appropriate pads for your machine and the task at hand. Generally, a soft white or natural hair pad is suitable for buffing.
- Dust mop or vacuum cleaner: Remove loose dirt and debris from the floor before buffing.
- Floor cleaner: Use a neutral pH floor cleaner diluted according to the manufacturer’s instructions.
Step-by-Step Process:
1. Prepare the Area:
– Remove any obstacles or furniture from the area you plan to buff.
– Close off the area if necessary to prevent foot traffic during the buffing process.
– Ensure good ventilation in the area by opening windows or doors.
2. Dust and Clean:
– Start by dust mopping or vacuuming the floor to remove dirt and debris.
– Clean the floor with a neutral pH floor cleaner using a mop or an automatic scrubber if available.
– Allow the floor to dry completely before proceeding.
3. Attach Buffing Pad:
– Install a clean, dry buffing pad onto your buffing machine’s pad driver.
4. Safety Precautions:
– Wear appropriate personal protective equipment (PPE), including safety glasses, ear protection, and non-slip footwear.
– Make sure the power cord of the machine is safely out of the way.
5. Buffing Technique:
– Start in one corner of the room and work your way towards the exit to avoid stepping on the freshly buffed floor.
– Turn on the machine and gradually lower it to the floor while holding onto the handle.
– Move the machine in slow, overlapping passes, covering the entire area evenly.
– Apply slight downward pressure to the machine to ensure the buffing pad makes contact with the floor.
– Pay extra attention to high-traffic areas and scuff marks. You may need to make additional passes in these areas.
6. Monitor the Buffing Pad:
– Periodically check the buffing pad for soil buildup. If it becomes too soiled, replace it with a clean one to avoid scratching the floor.
7. Buffing Solution:
– If the floor finish appears dull or lacks shine, you can apply a spray buffing solution according to the manufacturer’s instructions. This solution will help restore the gloss.
8. Finish Buffing:
– Continue buffing until you achieve the desired shine and appearance.
– Once finished, turn off the machine and lift it off the floor.
9. Clean Up:
– Remove the buffing pad and clean it for future use.
– Return furniture and obstacles to their original positions.
Buffing a commercial floor finish should be done regularly to maintain its appearance. The frequency of buffing depends on foot traffic and wear and tear. Regular maintenance will keep your floors looking clean, shiny, and professional, enhancing the overall atmosphere of your commercial space.